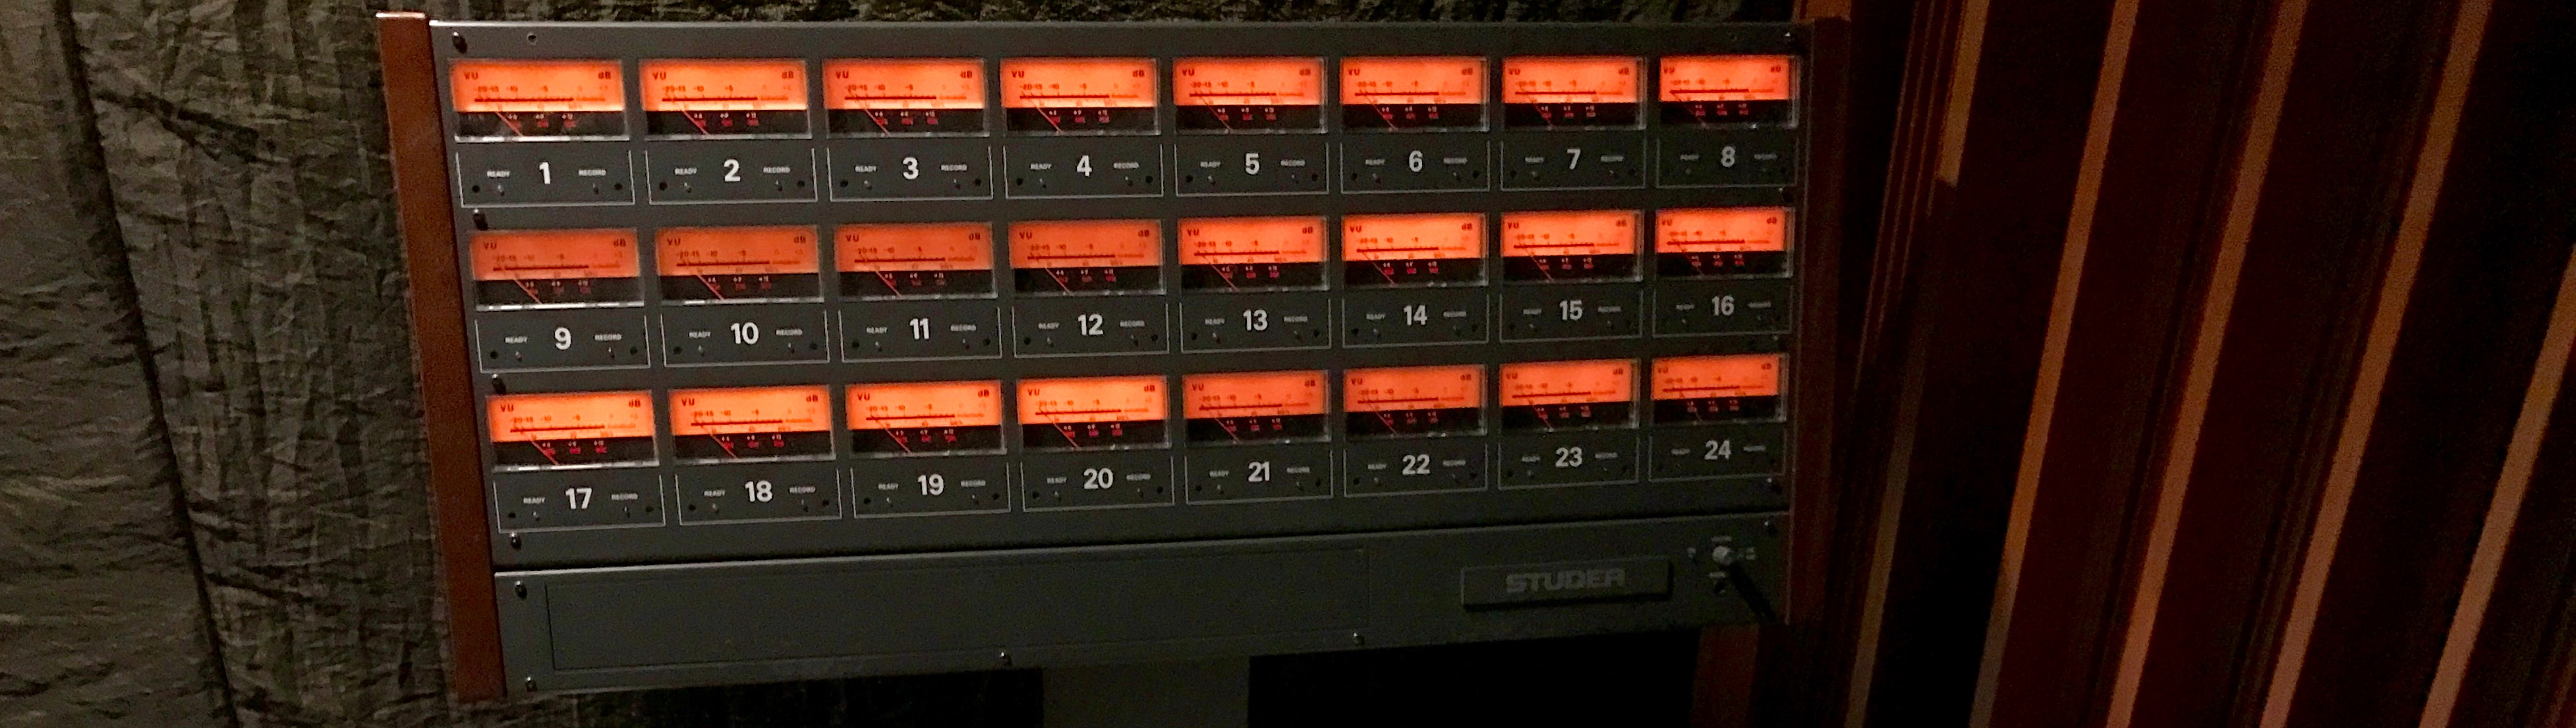
Studer & Dolby in 213
A reference by Paul AngelliTape Path
Reference Videos
Studer A-827 Handling and Care
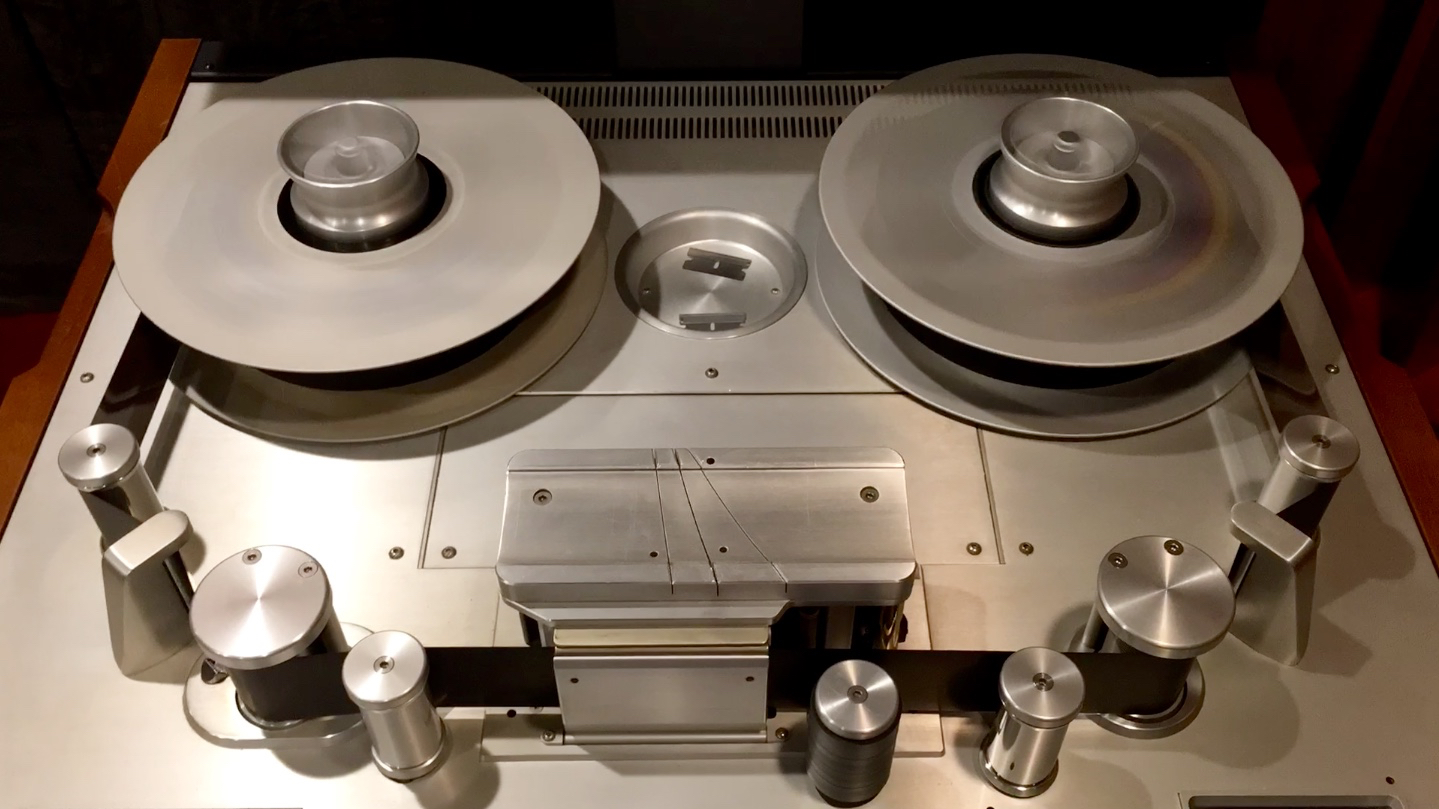
Studer Loading and Unloading
- A note about NEW REELS of tape. You are reusing a light-use reel of tape from last year. It should have been erased prior to your taking ownership. Put your reel on the right-side hub — the Take-Up side – being sure to line up the spindle pins with the keys in the hub. Lock it down by finger-tightening (no need to crank it) the rotating flappy-thing in the hub. If needed, add a tail leader and, when you have later wound your tape all the way to the supply reel (left-hand hub), add a head leader. More on Leadering below.
- By hand, gently pull enough tape (about 4 feet) from the reel to gently thread through the tape guide path. Be sure to get a tight first wrap on the supply reel. You should be able to pull tape from the take-up side to the supply side simply by rotating the supply flange side clockwise by hand. If the tape slips when you rotate the supply flange, wrap a few more layers of tape onto the supply flange. Get the tape to grab (via friction) supply hub by wrapping it onto the hub under tape tension, via fingers and thumbs through the flange hole during rotations from 3 o’clock to 9 o’clock (eastern time). Obviously, this has to be seen to be believed.
- Double check, visually, that the tape path is correct, then ‘load’ the Studer by pushing the Stop button. The deck will load the tape, gently applying tension. If it does not, check that the wrap on the supply reel is good and tight. Then, re-tension the tape through the guide path and load the tape. Also check for the Tacho Error.
- Once the deck is loaded DO NOT handle the reels or guide arms. They are under a good amount of tension. If you need to manually rock the tape, use the Cue button and wheel on the remote.
- To UNLOAD the Studer, push the unload button. I know, right?
- Remember to put the shield up.
Cleaning and Tape Storage
- Head stacks: use Q-Tips with alcohol. Wipe the heads with a strictly horizontal motion; vertical motion damages the heads.
- Guide Arms and Rollers: If Q-Tips were boring you, fold a micro-wipe into half or quarter, get some alcohol on it, and clean the surfaces of the guide arms and red rollers. It is OK to use alcohol on all of these surfaces.
- Tape Storage: Always store analog tape vertically, not lying flat. Given the amount of weight (particularly with 2” tape), the tape will become non-uniformly packed across the reel and the flanges can warp.
Editing and Leadering Your Reel of Tape
- You will need to drop in up to 3 leaders:
- Head Leader
- Tones Leader at 2:00
- Tail Leader
- As the tape is tails out when you start, drop in the Tail Leader first. Fast wind the tape entirely over to the Supply Reel. Drop in the Head Leader. Time out 2:00 and drop in the Tones Leader.
- Between the Head Leader and the Tones Leader, print tones across all 24 tracks, 30 seconds each, at 0VU. Print SR Noise, 30 seconds, at current level, from the SR unit.
- 1 kHz
- 10 kHz
- 100 Hz
- Dolby SR Noise
- Do not use the back of a razor blade to flatten 2” tape, leader or editing tape within the edit block as this method can damage the edit block surface. Use only the back of a fingernail or clean dry Q-Tips. You want splices to be flat and even with no air in the edit tape once you’re finished.
- Use approximately 5 or 6 wraps of leader for the head and tail. (4 to 5 feet)
- Use approximately 8 wraps (5 to 6 feet) of leader between tones and program portion of 2” tape. Remember, you need a good amount to prevent print-through but not too much. Leader tape is expensive, so avoid excess.
- Use the angle cut for all edits except the OUTSIDE head and tail cuts, which should be done at 90 degrees. This means that the leader tape end you see when the reel is fully wound in either direction should be a straight cut.